According to Wikipedia, “GraphQL is a data query language developed internally by Facebook in 2012 before being publicly released in 2015. It provides an alternative to REST and ad-hoc web service architectures. It allows clients to define the structure of the data required, and exactly the same structure of the data is returned from the server. It is a strongly typed runtime which allows clients to dictate what data is needed. This avoids both the problems of over-fetching as well as under-fetching of data.”
The following tutorial will help you establish your first GraphQL Server to help you speed up your development process.
Framework
In this tutorial, we will use Node js, a JavaScript runtime built on Chrome’s V8 JavaScript engine. The details and downloaded files can be found here.
Tools
Visual Studio Code is a code editor redefined and optimized for building and debugging modern web and cloud applications
An interactive in-browser IDE for exploring GraphQL.
Modules
Fast, unopinionated, minimalist web framework for node.
Helpful in creating GraphQL HTTP server based on any type of HTTP web framework as long as it supports connect styled middleware, and includes Express, Restify, and Connect itself.
The JavaScript reference implementation for GraphQL is a query language for APIs created by Facebook.
Get a full fake REST API with zero. It is dedicated to front-end developers who are in need of a quick back-end for prototyping and mocking.
Promise based HTTP client for the browser and node.js
Let’s Start the GraphQL server!
How To:
1. Setup the node folder

2. Install the modules

3. Create db.json for the simple mock data.
We have three entities:
1. Authors have an attribute id, name, age, email and phone.
2. Books have an attribute id, title, edition, genre, publisherId, and authorId.
3. Publishers have attribute id, publisherName and address.
Here my sample data:
{

    "authors": [

      {

        "id": "1",

        "name": "Peter the author",

        "age": 41,

        "email": "peter@test1.com",

        "phone": 1234561111

      },

      {

        "id": "2",

        "name": "Bane the author",

        "age": 42,

        "email": "Bane@test2.com",

        "phone": 1234562222

      },

      {

        "id": "3",

        "name": "Someone",

        "age": 43,

        "email": "Someone@test3.com",

        "phone": 1234563333

      }

    ],

    "books": [

      {

        "id": "1",

        "title": "BookOne",

        "edition": 1,

        "genre": "Drama",

        "publisherId": "1",

        "authorId": "1"

      },

      {

        "id": "2",

        "title": "BookTwo",

        "edition": 1,

        "genre": "Science fiction",

        "publisherId": "1",

        "authorId": "2"

      },

      {

        "id": "3",

        "title": "BookThree",

        "edition": 1,

        "genre": "Science fiction",

        "publisherId": "2",

        "authorId": "3"

      },

      {

        "id": "4",

        "title": "BookFour",

        "edition": 1,

        "genre": "Romance",

        "publisherId": "1",

        "authorId": "2"

      }

    ],

    "publishers": [

      {

        "id": "1",

        "publisherName": "Publisher_one",

        "address": "Address Street 1"

      },

      {

        "id": "2",

        "publisherName": "Publisher_two",

        "address": "Address Street 2"

      }

    ]

  }
4. Create Schema.js. GraphQLSchema object becomes the core of GraphQL server.
It consists of two major components:
- Schema definition
- Actual implementation that is taking the form of resolver functions
Inside the schema, I will create a nested query between author, book and publisher. The relation can be seen in the picture below:

Here’s my schema:
const graphql = require('graphql');

const axios = require('axios');

const {

GraphQLObjectType, GraphQLString, GraphQLInt,

GraphQLSchema, GraphQLList, GraphQLNonNull

} = graphql;

//New GraphQL object type for publisher

const PublisherType = new GraphQLObjectType({

  name: 'Publisher',

  fields: () => ({

    id: { type: GraphQLString },

    publisherName: { type: GraphQLString },

    address: { type: GraphQLString }

  })

});

//New GraphQL object type for Book

const BookType = new GraphQLObjectType({

    name: 'Book',

    fields: () => ({

      id: { type: GraphQLString },

      title: { type: GraphQLString },

      edition: { type: GraphQLInt },

      genre: { type: GraphQLString },

      publisher: {

        type: PublisherType,

        resolve(parentValue, args) {

          return axios.get(`http://localhost:3000/publishers/${parentValue.publisherId}`)

            .then(res => res.data);

        }

      }

    })

  });

//New GraphQL object type for Author

const AuthorType = new GraphQLObjectType({

  name: 'Author',

  fields: () => ({

    id: { type: GraphQLString },

    name: { type: GraphQLString },

    age: { type: GraphQLInt },

    email: { type: GraphQLString },

    phone: { type: GraphQLInt },

    books: {

      type: new GraphQLList(BookType),

      resolve(parentValue, args) {

        return axios.get(`http://localhost:3000/authors/${parentValue.id}/books`)

          .then(res => res.data);

      }

    }

  })

});

const RootQuery = new GraphQLObjectType({

  name: 'RootQueryType',

  fields: {

    author: {

      type: AuthorType,

      args: { id: { type: GraphQLString } },

      resolve(parentValue, args) {

        return axios.get(`http://localhost:3000/authors/${args.id}`)

          .then(resp => resp.data);

      }

    }

  }

});

module.exports = new GraphQLSchema({

  query: RootQuery

});
5. Create server.js. Simple setup of express-graphql as a route handler.
The graphqlHTTP function options that I used are:
a. Schema: A GraphQLSchema instance from schema.js. A schema must be provided. Usually the syntax ”schema:” appears, but since we use similar variable names we can just write “schema”.
b. Graphiql : If true, it will present GraphiQL when the GraphQL endpoint is loaded in a browser. This is quite useful to test your query.
There’s are other options available. You can find more details here.
const express = require('express');

const expressGraphQL = require('express-graphql');

const schema = require('./schema.js');

const app = express();

app.use('/graphql', expressGraphQL({

  schema,

  graphiql: true

}));

app.listen(4000, () => {

  console.log('Port4000: Listening');

});
6. Add the purple highlighted line to package.json.
This line will help us to run json server and watch its activity.
{
"name": "author",
"version": "1.0.0",
"description": "",
"main": "schema.js",
"dependencies": {
"axios": "^0.17.1",
"express": "^4.16.2",
"express-graphql": "^0.6.11",
"graphql": "^0.13.0",
"json-server": "^0.12.1"
},
"devDependencies": {},
"scripts": {
"test": "echo "Error: no test specified" && exit 1",
"json:server": "json-server --watch db.json",
"start": "node server.js"
},
"author": "",
"license": "ISC"
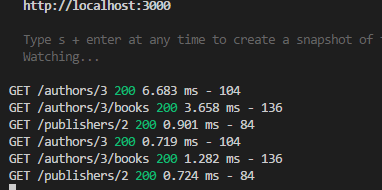
}7. Open Terminal and start the json server by type

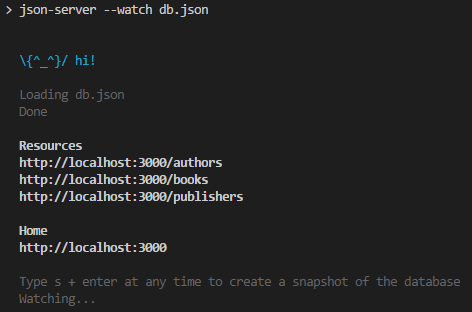
8. Open another terminal and start graphql server by type:


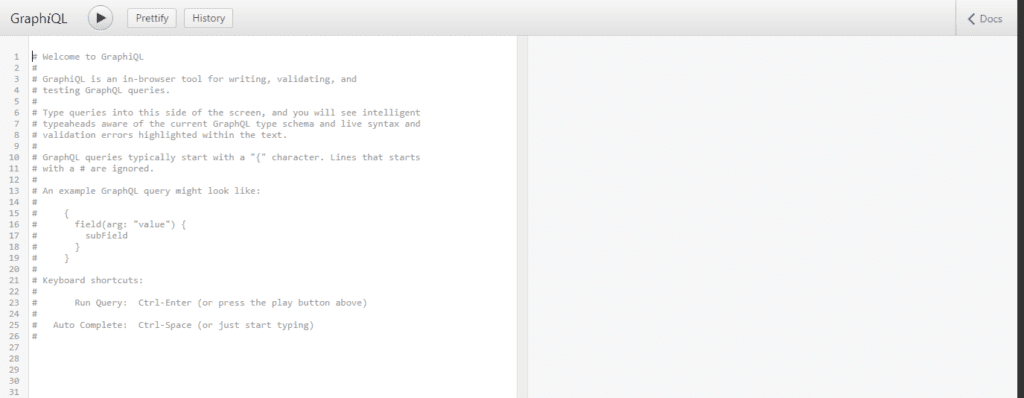
9. Open http://localhost:4000/graphql in browser.
The tool graphiql will show.
10. Click
<Docs button in top right, you will get Documentation Explorer.
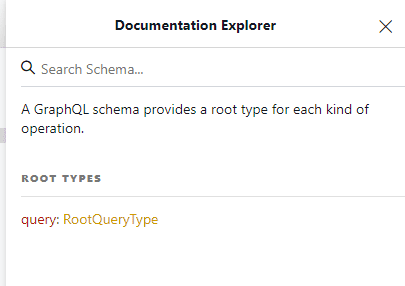
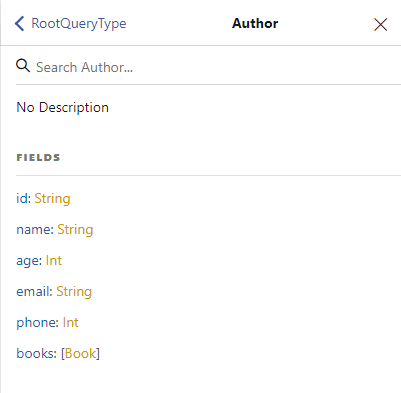
11. Click RootQueryType
You will get author fields, it will show all available fields to query.
12. Play around with the query and make sure you get the requested data.
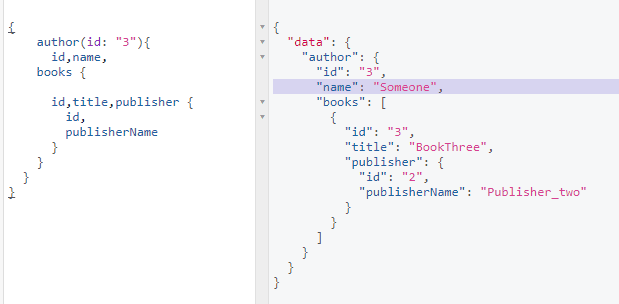
In the example below, I tried to query:
- author with id 3, along with id, name and books.
- Inside the books I need id, title, and publisher.
- Inside publisher I need id and publisher name.
As a result, it only returns what you need.
13. You can watch the activity in terminal each time you make a query.