

SQL Server Integration Services (SSIS) is defined as a platform for building enterprise-level data integration and data transformation solutions. It is used to solve complex business problems by copying or downloading files, loading data warehouses, data cleansing and mining data, and managing SQL Server objects and data.
What people want to achieve by using SSIS:
- Do ETL (Extract-Transform-Load) fast
- In a specific scheduler time
Some people feel SSIS pricing is too expensive and want to use a more cost-effective technology to handle ETL for big data. But there are several other reasons why people don’t want to use SSIS:
- SSIS has limited transformation and conditional branching. It is not suitable for packages with a lot of scripts.
- SSIS packages are very difficult to debug.
- Script components are an absolute nightmare and should be used only for formatting, looping, or as a last resort.
- There were situations when SSIS was silently failing to populate some columns in some rows, just skipping them without raising exceptions, it can take a lot of time troubleshooting and figuring out what is going on.
This article explains how to do the ETL process using Azure Function. Below is the step-by-step tutorial:
The first step is creating the Azure Function Time Trigger solution. I am using Visual Studio 2019. Below is how it looks. Click on “Create a new project” then choose Azure Function.


If you don’t want the literal strings to be hardcoded, you can put it in a static class and move the Timer Trigger into the json setting file. Also, you can add some telemetry/log information/error handling. This is how it looks after some modification:


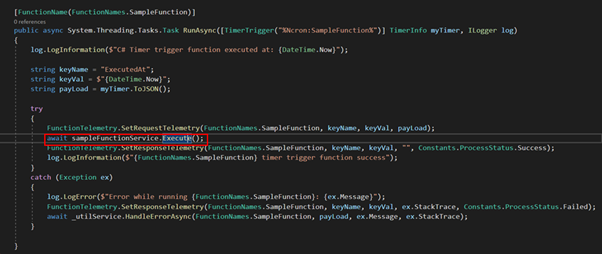
With this NCron setting: “0 0 2 * * *” This code will be executed every day at 2 am in the morning. Let’s see how the Execute method looks in the Service Layer:

There are 4 important processes here:
- Clearing the Staging Table (if there is any staging table)
- Get/Retrieve sample data
- Transform the Data
- Update the data in the target tables (we won’t discuss this since this is a custom logic implementation)
Let’s go through them:
1. Clearing Staging Table
This is a regular method, used to clear the table which is acting as a staging/temporary table. The SQL script looks like the below. Using Truncate instead of Delete will clear the table faster.
TRUNCATE TABLE [anyTable]
2. Get/Retrieve Sample Data
This populate all data from the source db. It can be thousands of data.
var sampleData = await repo.GetSampleData();This is another regular method which is used to retrieve the data:

3. Transform Data
This is the process of transferring the data into another table (and could be) in another database (as well):
await TransformData(sampleData.AsList());We have a private method for this process:

There are two different parts:
- ExecuteTransferData()
- TransferSampleData()
Let’s go through the TransferSampleData() first:

To save a large number of data, we have two options:
- Iterate and save the data one by one.
This will take a very long time to run. For ETL, we don’t want to use this. - Save the data in bulk using SqlBulkCopy.
This is much faster.
But if we choose the second approach (storing the data in bulk), there are two problems:
- If there is any invalid data, the copy will fail and we don’t know which records are causing it.
- If there is any invalid data, there is no specific error message, so that we know how to fix it.
These are the reasons why we want to SPLIT the data using the “ExecuteTransferData()”.

The idea of this method:
- First, split the process into several different processes/batches.
- Execute each batch using SqlBulkCopy.
- If there are any errors that occur in any batch, split the batch again.
- And so on until all VALID data can be stored and INVALID data can be identified with the specific error message.
Below is the illustration, e.g. there are 5600 data to be transferred, try the following:
- Execute the 5600 data altogether in one batch. If this succeeds, then there will be no more steps. But, if there is any invalid data, this process will fail so it must be split into batches.
- Split the data by dividing it by 1000. This means there will be 6 batches (6 times SqlBulkCopy execution). At least one batch will fail.
- The data in the failed batch will be divided again by 100. This means, there will be 10 times the SqlBulkCopy execution. At least one batch will fail.
- The data in the failed batch will be divided again by 10. This means, there will be 10 times the SqlBulkCopy execution. At least one batch will fail.
- The data in the failed batch will be executed one by one. This means there will be 10 times the SqlBulkCopy execution. At least one data will fail. From here, we can see the specific error on specific data.
We put this logic into the BaseService so all services can use it. What’s in this method? See below:

As explained in the illustration above, at first the List data will be executed in one BIG batch of data. If there is any error then it will go to the catch section. In this catch section, we do the splitting and receiving the specific error message from each error data.
This method is running recursively. This means it calls to itself with a new list of smaller data in the parameter.
There are 3 parameters in this method:
- List<T>data
This is the data that will be executed with the SqlBulkCopy. If there is any error then this data will be divided by the limit into several new lists in smaller data - int? limit
On the first try, the limit will be taken from the configuration. In this sample, we set it as 1000 (this should be set differently for each project based on how big the data is regularly being processed). And we will divide it by 10 for each iteration of the recursive process. So, the value will be 1000, 100, 10, 1. This acts as the data divider. - Func<List<T>, Task>executeFunc
This is the main process/method (the one that calls the SqlBulkCopy)
You can see in the code, there is another Method called PagingData. This is used to split the data into the new lists of data:

This way, we can achieve the goal:
- Do ETL (Extract-Transform-Load) fast
- In a specific scheduler time
Benefits of using Azure Function:
- We can identify the invalid data with the specific error message
- We can add any custom logic as we want
Author:
Pungkas Yoga Kesuma – Analyst Programmer


