
DevOps has been the most discussed subject these days, especially in Continuous Integration/ Continuous Delivery (CI/CD). Therefore, CI/CD has been the main component of the software development cycle, with so many configurations and tools available. We will use Amazon Web Services (AWS) as the cloud platform, Github for the code repository, Jenkins for the Continuous Integration (CI), and AWS CodeDeploy service for the Continuous Delivery (CD).
Requirements:
- AWS account.
- Jenkins must be installed on local or on the AWS EC2 Instance (I will use Jenkins on EC2).
- Github account.
Follow the guide that AWS provided here to install the CodeDeploy Agent on EC2.

We need to create IAM roles in the first step. There are two types of IAM roles that are required: Service Role and Instance Role.
- Service Role: Service Role access will be granted to AWS CodeDeploy to read through your EC2 instance tags. For auto-scaled instances, they will look for your autoscaling name tags. Follow the guide from AWS: https://docs.aws.amazon.com/codedeploy/latest/userguide/getting-started-create-service-role.html > Create a service role (console).
- Instance Profile Role: EC2 instances need to be launched with proper permissions to access files from S3 buckets, so the Instance Profile Role will give access to EC2 samples to read code from S3 Buckets. Follow the guide from AWS: https://docs.aws.amazon.com/codedeploy/latest/userguide/getting-started-create-iam-instance-profile.html > Create an IAM instance profile for your Amazon EC2 instances (console).
Step 1: Setup AWS EC2 Instance
Create AWS EC2 instance (Amazon Linux virtual machine) that will feature different AWS services to support the application (I use Redhat 8 as the Operating Systems). Follow the guide from AWS: https://docs.aws.amazon.com/codedeploy/latest/userguide/instances-ec2-create.html
Note: use the Instance Profile Role created above for the IAM roles.
Step 2: Install CodeDeploy Agent on EC2
The instance we have created must have a CodeDeploy agent installed on it to proceed to the code deployment on the sample. Follow the guide from AWS: https://docs.aws.amazon.com/codedeploy/latest/userguide/codedeploy-agent-operations-install-linux.html
Step 3: Create an S3 Bucket for the Application Code
The application codes should be uploaded to a location where CodeDeploy can deploy it. In this case, the AWS S3 bucket is used. Follow the guide from AWS to create an S3 bucket: https://docs.aws.amazon.com/AmazonS3/latest/gsg/CreatingABucket.html
Step 4: Configure AWS CodeDeploy Service
We need the following requirements to use the AWS CodeDeploy service:
- An application
- A Deployment Group
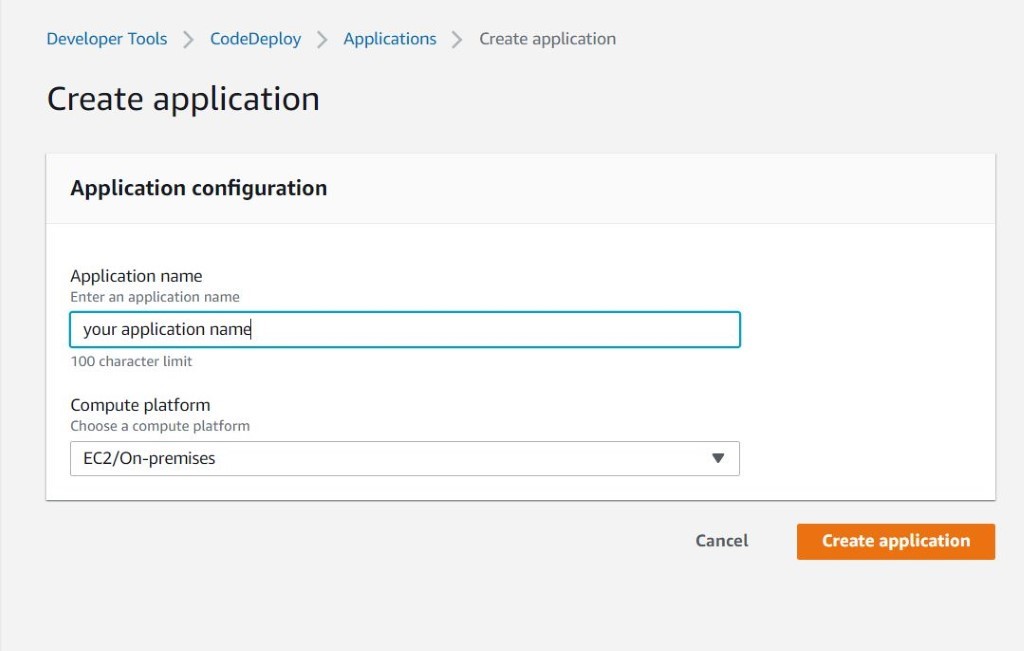
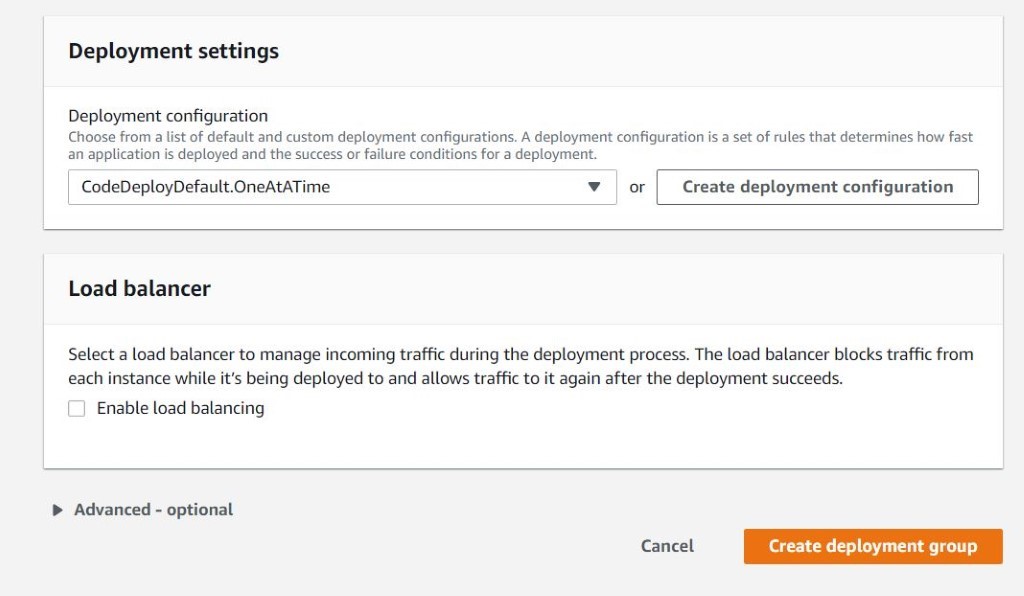
The next step is to create an Application on AWS, which will hold the demo application and the Deployment Group.
1. Create an application.
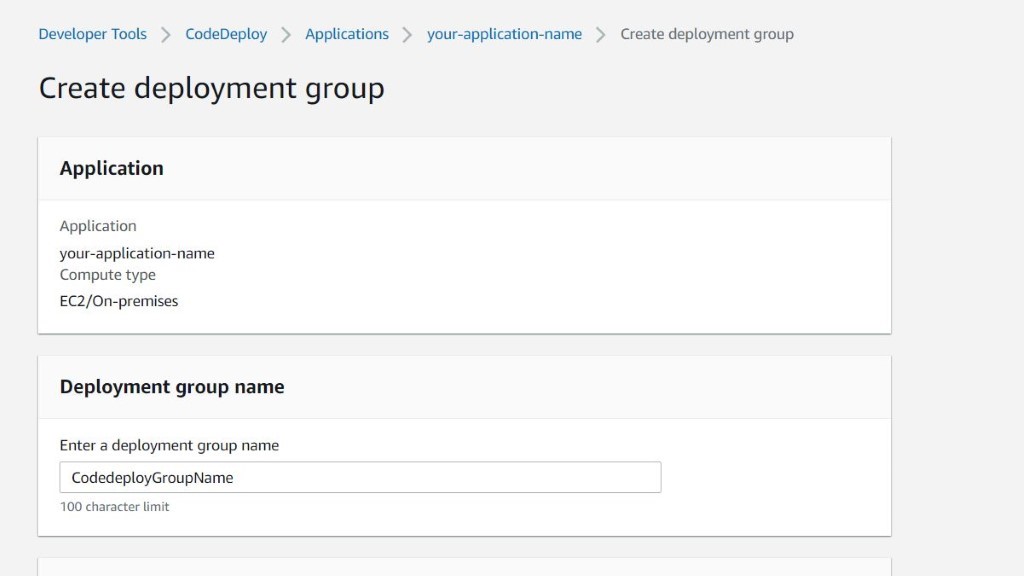
2. Create the deployment group.
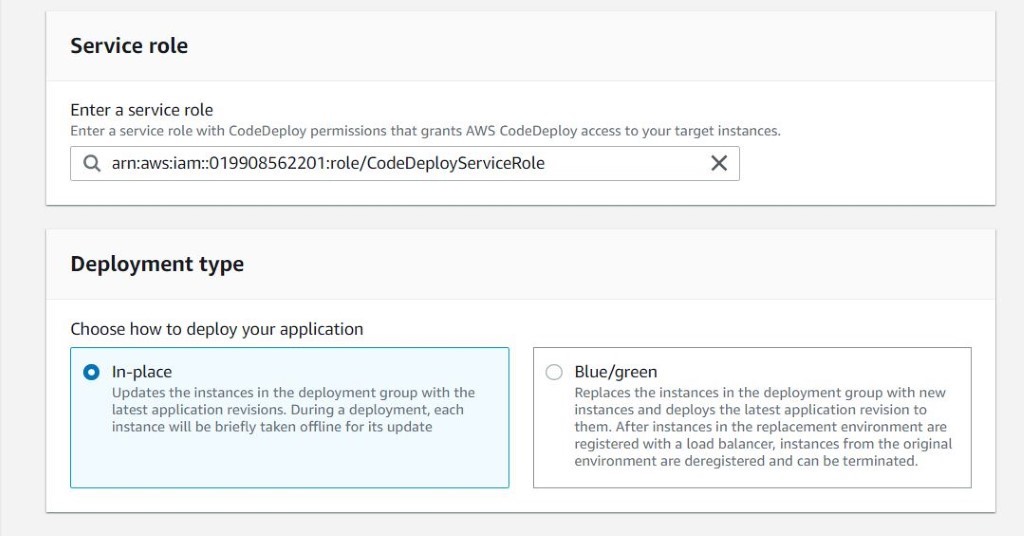
3. Select the created service role.
4. Select the EC2 instance name and ensure there is a matched instance.
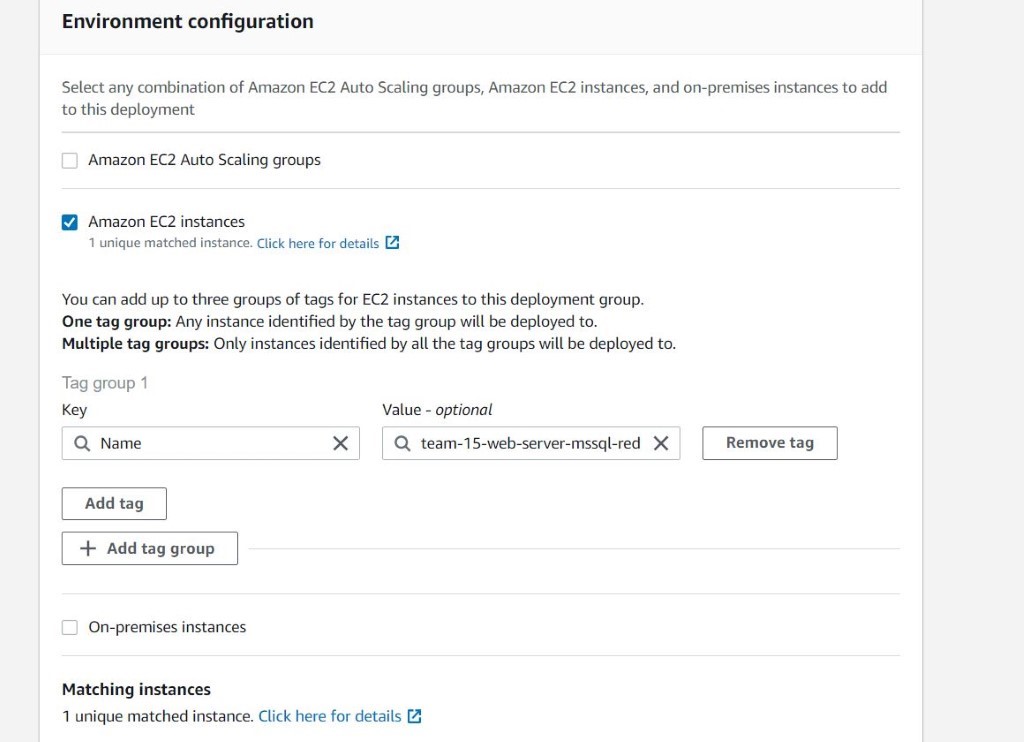
5. Select OneAtATime for deployment settings. This one is optional if we have configured the AWS CodeDeploy Agent manually.
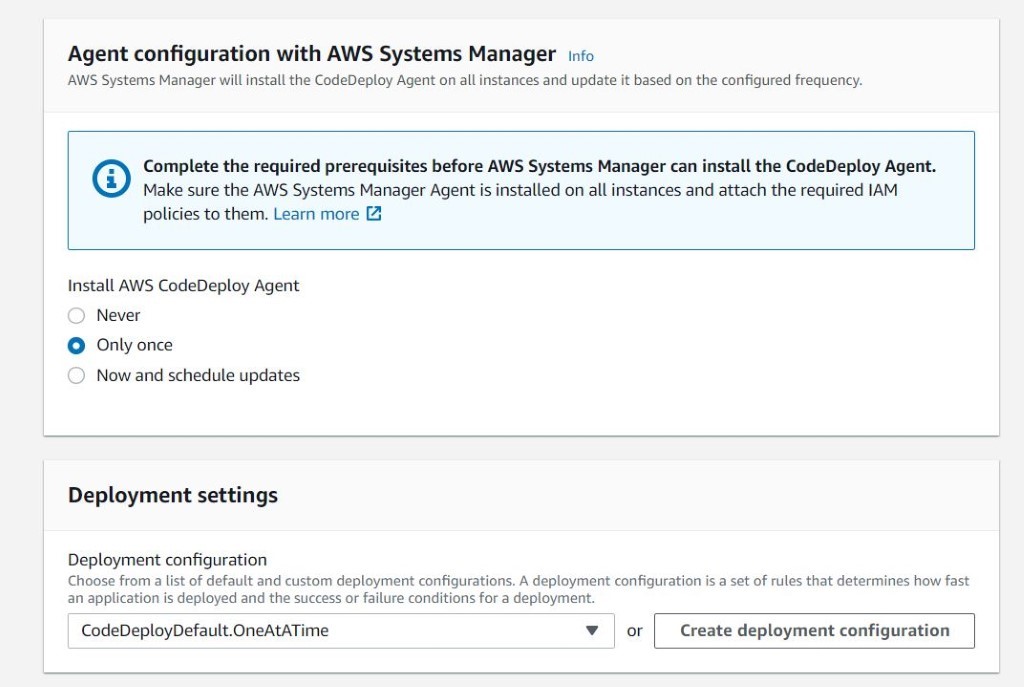
6. Create the deployment group.
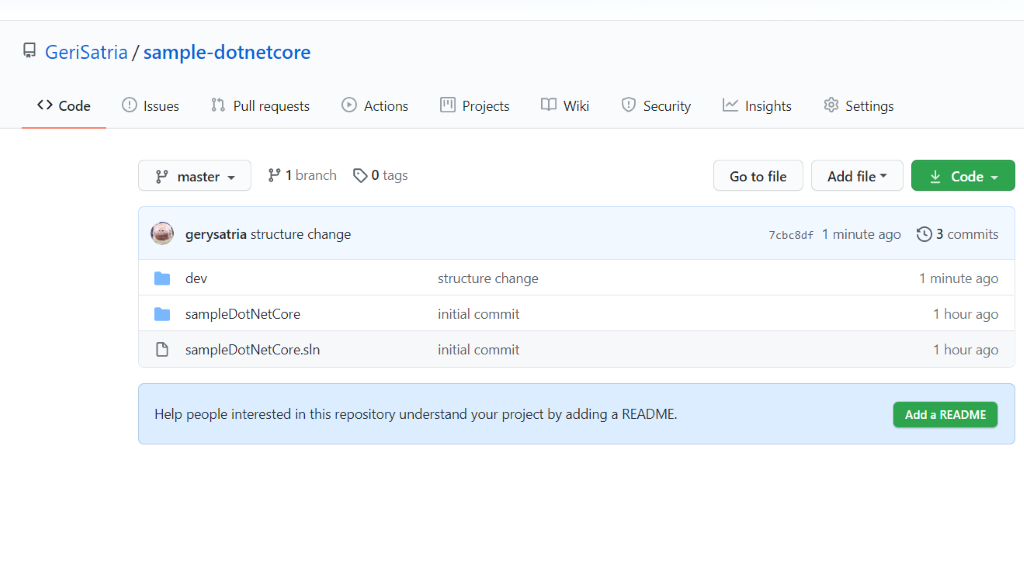
Step 5: Configure Github
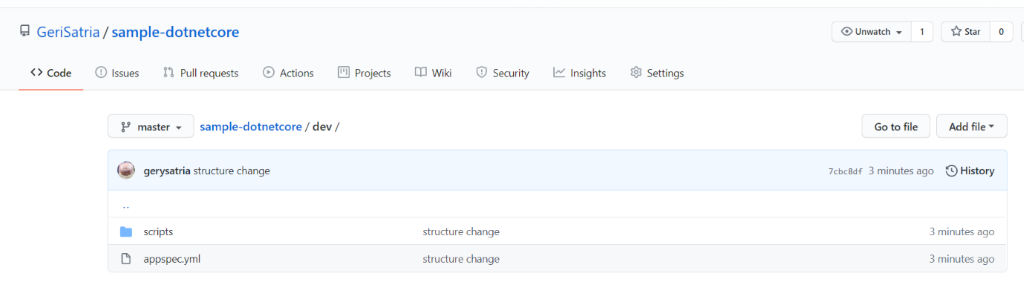
We are using. NetCore web API as a sample code here with the following structure having the publish output under the “Dev” folder.
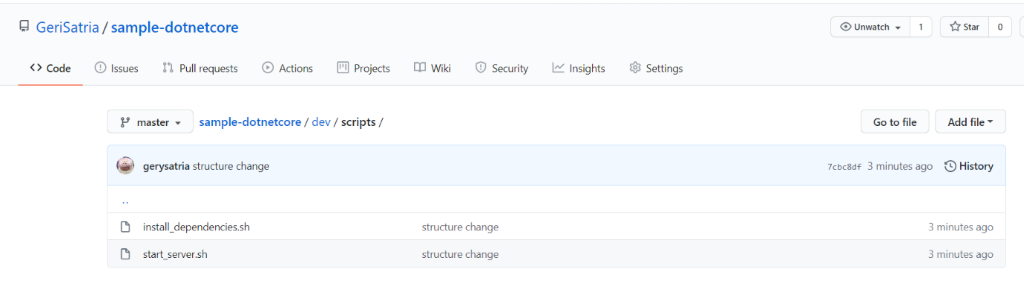
Add appspec.yml and scripts under the dev with the following:
Under the appspec.yml file, write the following:
appspec.yml: The application specification file (AppSpec file) is a YAML-formatted or JSON-formatted file used by AWS Codedeploy to manage deployment.
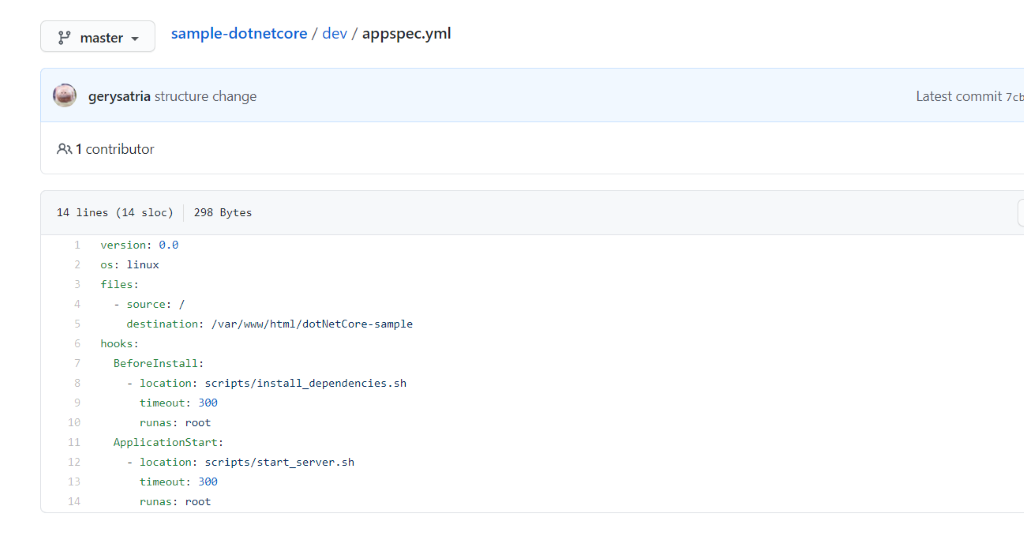
In the above YAML file, the source is the root (/) because the appspec.yml is located under the dev folder, and the result of .Net Publish will be under the dev folder also.
Step 6: Configure Github hook with Jenkins
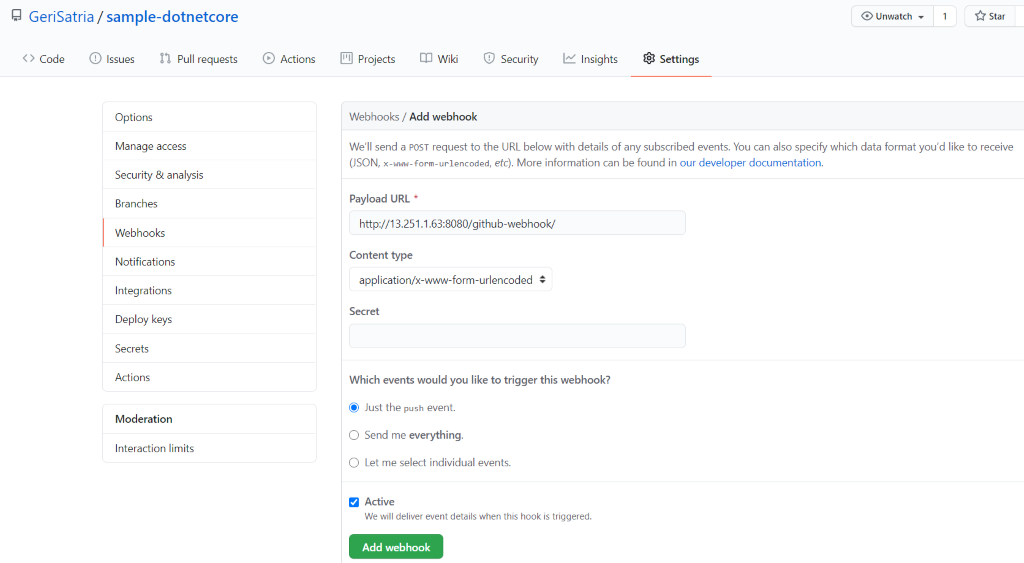
We will set up the Github to trigger Jenkins when the push event happens. We need to create a webhook to trigger Jenkins.
URL format: http://jenkinsserverip:8080/github-webhook/
Step 7: Configure Jenkins with AWS CodeDeploy plugin
1. Ensure the AWS CodeDeploy plugin is installed in Jenkins
Also, ensure the Jenkins Server has .Net Core SDK, installed.

2. Create a new FreeStyle job with the following configurations
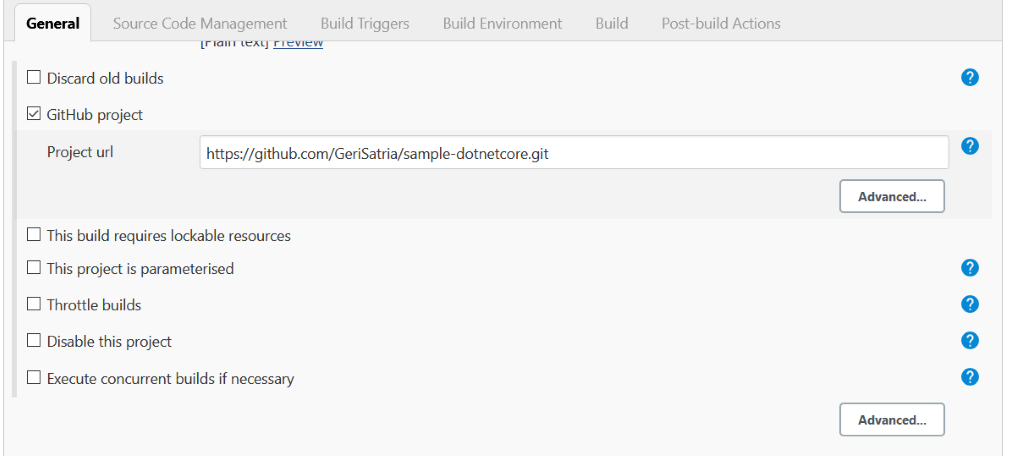
General: Check and enter the GitHub project repository link
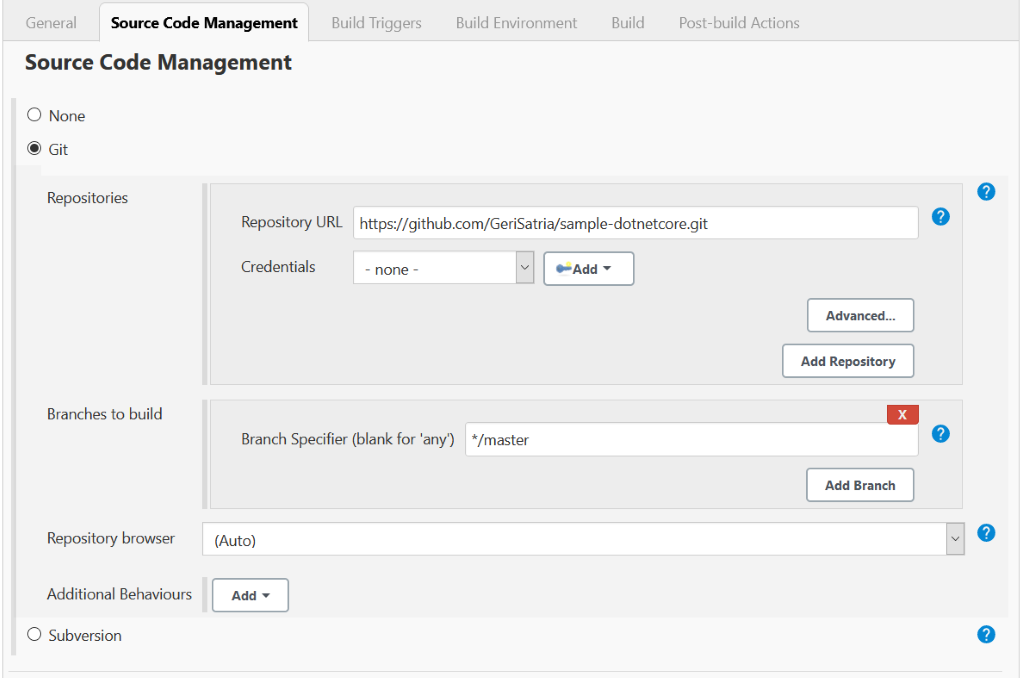
SCM: Select Git and enter the repository URL
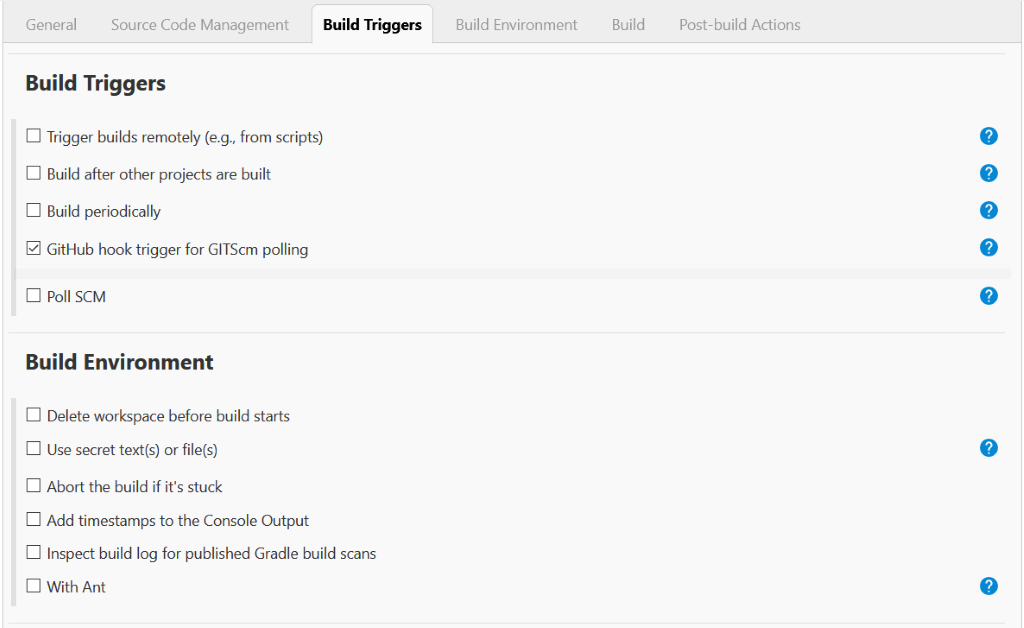
Build Triggers: Check the GitHub hook a trigger to make the project run with automation when there is a push event to the repository.
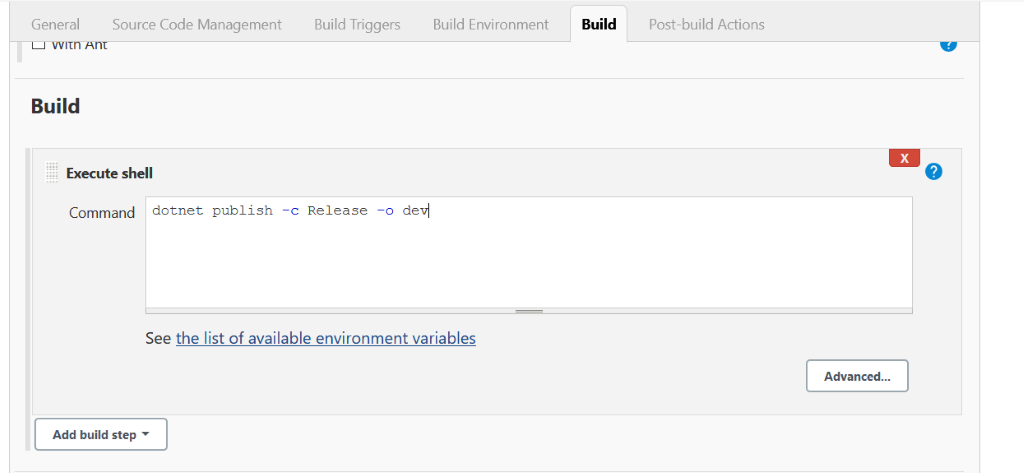
Build: Publish and put the published code under the dev folder
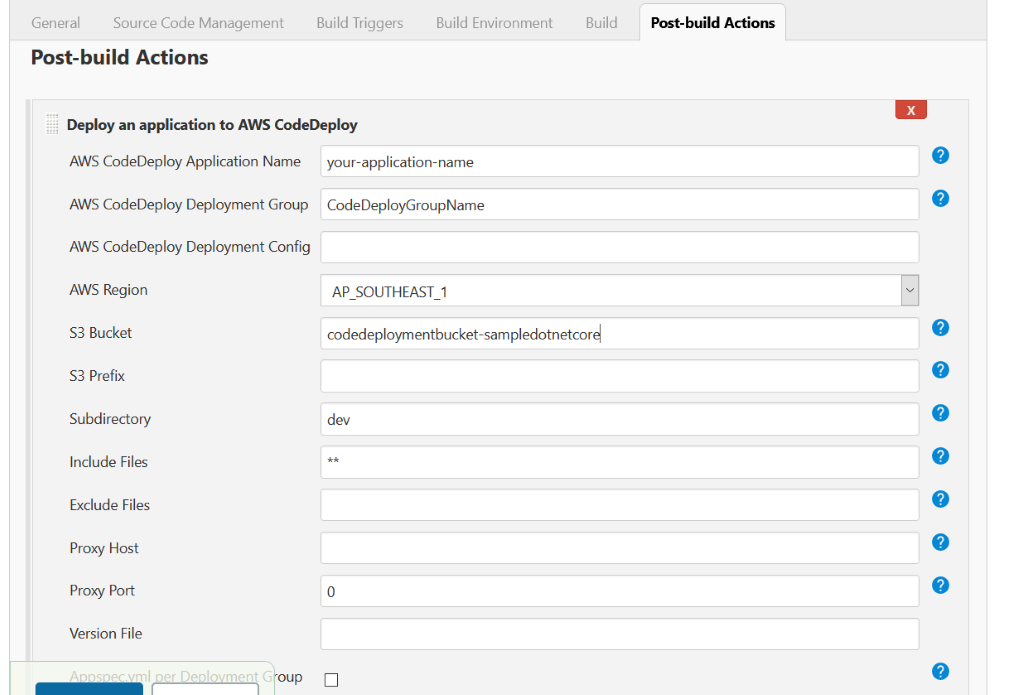
Post-build Actions: Enter the CodeDeploy settings that we have configured previously to the Jenkins
Now, we are all set to see the result here. As we make some changes in the code that will trigger Jenkins jobs to build automatically, the AWS CodeDeploy will start deploying the code when Jenkins successfully builds the project. The result will be deployed under the destination server instance that we have configured before.

As the server that I am using is Linux, we need to create the service file for the API project that we have deployed. We can follow the Microsoft documentation for deploying .Net Core on Linux here https://docs.microsoft.com/en-us/aspnet/core/host-and-deploy/linux-nginx?view=aspnetcore-3.1.
Author:
I Gusti Fauzi Geri Satria – Analyst Programmer


